


M4A3 (76)-Yvonne
 01-27-2023, 05:06 PM
#26

Thread Starter
 01-28-2023, 07:00 AM
#27
You can try wet sanding too. Soak a sanding sponge in water and use it. Way less dust, and it gives a slightly different finish.
01-28-2023, 07:47 AM
#28
Thread Starter
Good to know, thanks. The paint booth I built consists of a cheap plastic storage bin turned on it's side, cut a hole in the back, install a inexpensive bathroom fan, a flexible dryer tube and a filter, works great
The following 2 users liked this post by Rebellion13:
Pah co chu puk (01-28-2023),
tankme (01-28-2023)

The following users liked this post:
Caddywompas (02-01-2023)
02-19-2023, 01:47 PM
#33
Thread Starter
update, well not really. Been really busy and didn't have time to work on this until today. Finishing up the speaker box, casting on turret, and just broke in the gearboxes. Hopefully will be able to make some sort of headway this week. It is like watching paint dry......and that is exactly what I am doing
Wade
Wade
02-20-2023, 09:25 AM
#34
Thread Starter
Question for anyone who has built one of these. I am having a hard time installing the gear box mounting plates, the holes on the hull are not threaded and seem to be smaller then the screw diameter, now I know what most will say is drill a bigger hole lol. I shouldn't have to do that. Has anyone kept applying pressure until the screws eventually grab and then seat themselves? Any tips would be greatly appreciated.
Cheers
Wade
Cheers
Wade
02-20-2023, 11:20 AM
#35
Thread Starter
I finally got the plates mounted, only to find out they did not include the correct amount of screws to mount the gearboxes to the plates.......sigh. Now I will hopefully have screws that are the same diameter, I don't care about length I can always cut them down.So just a slight snag that's all.
Cheers
Wade
Cheers
Wade
02-20-2023, 12:14 PM
#36
Do you have any of those crummy zinc gearboxes that have crapped out on you? The screws that hold those together work great for holding down gearboxes. That's why, whenever a gearbox fails on me I always remove all of the screws from them. I've got a little jar that's just full of them. So if you're willing to wait, I can send you a bunch. But it would probably be easier just to go to the local hardware store. I'm pretty sure those are 3 mm machine screws.
02-20-2023, 02:04 PM
#37
You do have to be careful putting too much pressure on some of these screws especially if you are trying to get them to thread into metal. I've had a bunch of them snap in the hole and boy is that fun. You are better off getting an M3 tap and drill the hole the right size if you are using machine screws.
Derek
Derek
02-20-2023, 02:37 PM
#38
Thread Starter
Thanks gents, I ended up finding one of those boxes I had with various screw sizes, all metric and I used the 3mm they went in fine and I used them in place of the screws that came with the gear set. All is good
Cheers
Wade
Cheers
Wade
The following users liked this post:
tankme (02-20-2023)
02-20-2023, 03:24 PM
#39
Thread Starter
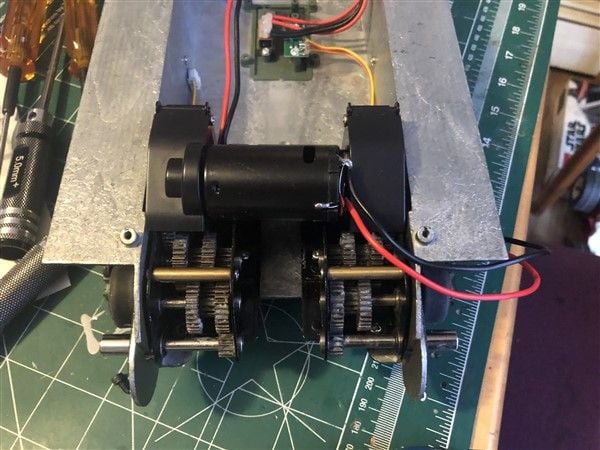
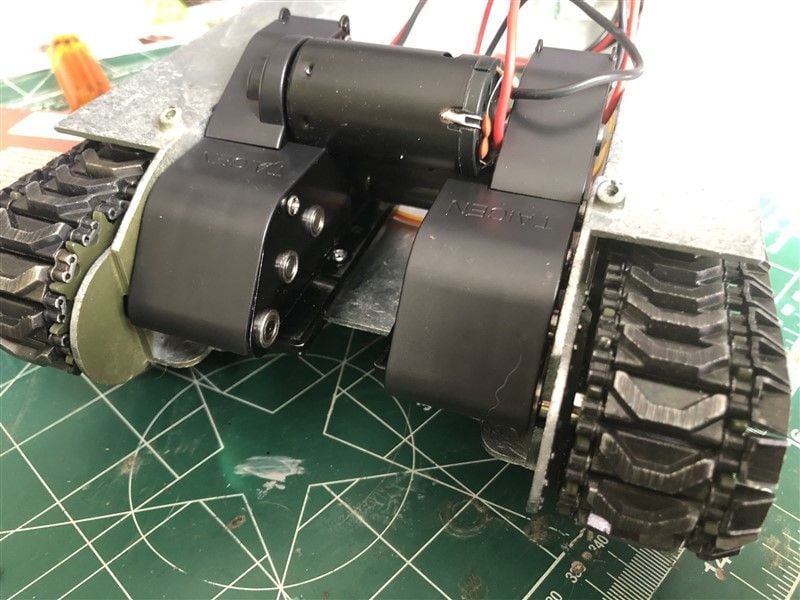
Ok this was a pain, getting the gearboxes mounted. After sitting and pondering over this for 2 hours, on how to get to the screws when the motors overlap each other........I decided I never want to do this again lol.
Last edited by Rebellion13; 02-20-2023 at 03:29 PM.
02-21-2023, 12:47 PM
#40
Thread Starter
Another question for anyone who has built one of these. The kit comes with an extra two links, are those to be installed or just extras? The tracks without them are a bit tight to get together, no sag whatsoever, I know on Sherman's the tracks are supposed to be tighter then say a tiger which sag a bit. And these are a pain to assemble, and I would like to avoid adding the links if they are just extras.
Thanks
Wade
Thanks
Wade
02-21-2023, 02:09 PM
#42
Usually extras, but that being said the tracks are usually installed loose and I have to remove additional links. My Tamiya and HL Sherman chassis like the tracks fairly tight. I will also usually check the adjustable idler to make sure it's not maxed out. I like to put it to it's loosest setting and add/remove links from that point unless it puts the idler too close to the road wheels. That isn't really a concern for a Sherman, but it is for a lot of Russian armor.
Derek
Derek
02-21-2023, 03:12 PM
#43
The taigen tracks should be installed with a slight amount of room but not much. They should fit but not be loose or tight. Don’t make them so tight they pull in the trannys. They will stretch over time, trust me. Eventually you will have to take a link out but it will be easy because the pins work themselves loose if you have the standard track without duckbills.
I never had a problem installing the taigen trannys into the Shermans, I own something like 8 of them I think and all have had the trannys out a few times for service.
I never had a problem installing the taigen trannys into the Shermans, I own something like 8 of them I think and all have had the trannys out a few times for service.
02-22-2023, 04:02 AM
#44
Thread Starter
The taigen tracks should be installed with a slight amount of room but not much. They should fit but not be loose or tight. Don’t make them so tight they pull in the trannys. They will stretch over time, trust me. Eventually you will have to take a link out but it will be easy because the pins work themselves loose if you have the standard track without duckbills.
I never had a problem installing the taigen trannys into the Shermans, I own something like 8 of them I think and all have had the trannys out a few times for service.
I never had a problem installing the taigen trannys into the Shermans, I own something like 8 of them I think and all have had the trannys out a few times for service.
Cheers
Wade
Last edited by Rebellion13; 02-22-2023 at 06:57 AM.
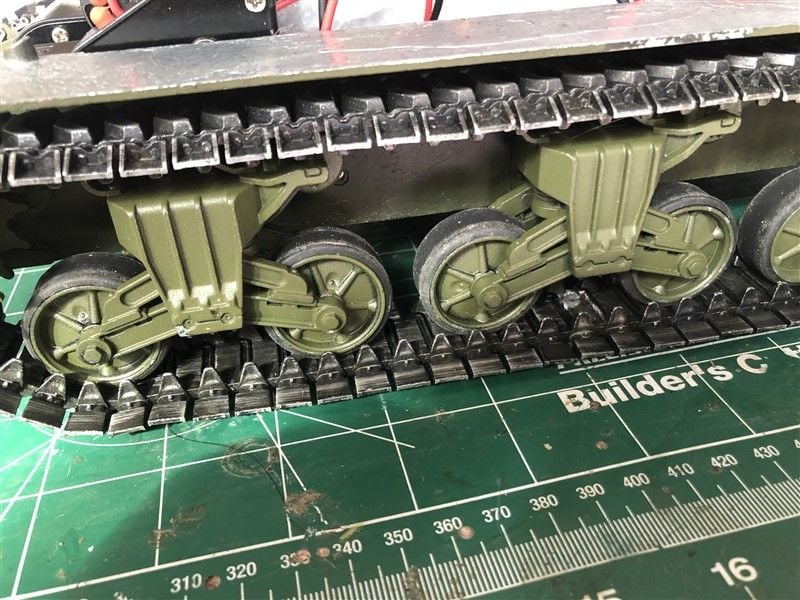
02-23-2023, 10:40 AM
#45
Thread Starter
Lower hull is basically finished, I have to add the covers for the Sprocket/Idler wheel. Now to move onto the upper hull. I originally wanted to do a repaint and then leave it be, but nooooo, I will be adding detailing here and there to give it more of a feel, I am not looking towards making sure everything is accurate to a 1:1. I know there are faults with the molding in not being a correct representation. and I was going to add casting to the transmission cover, but since it will be weathered it most likely will not even be seen.
Cheers
Wade
Cheers
Wade
The following users liked this post:
tankme (02-23-2023)
03-02-2023, 08:33 AM
#46
Thread Starter
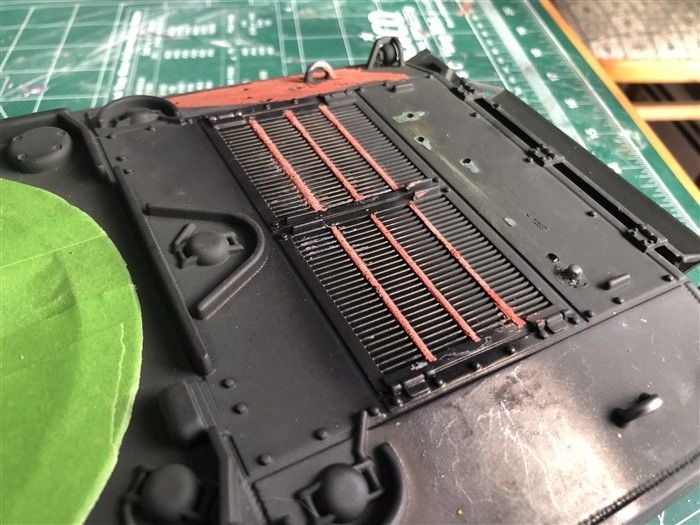
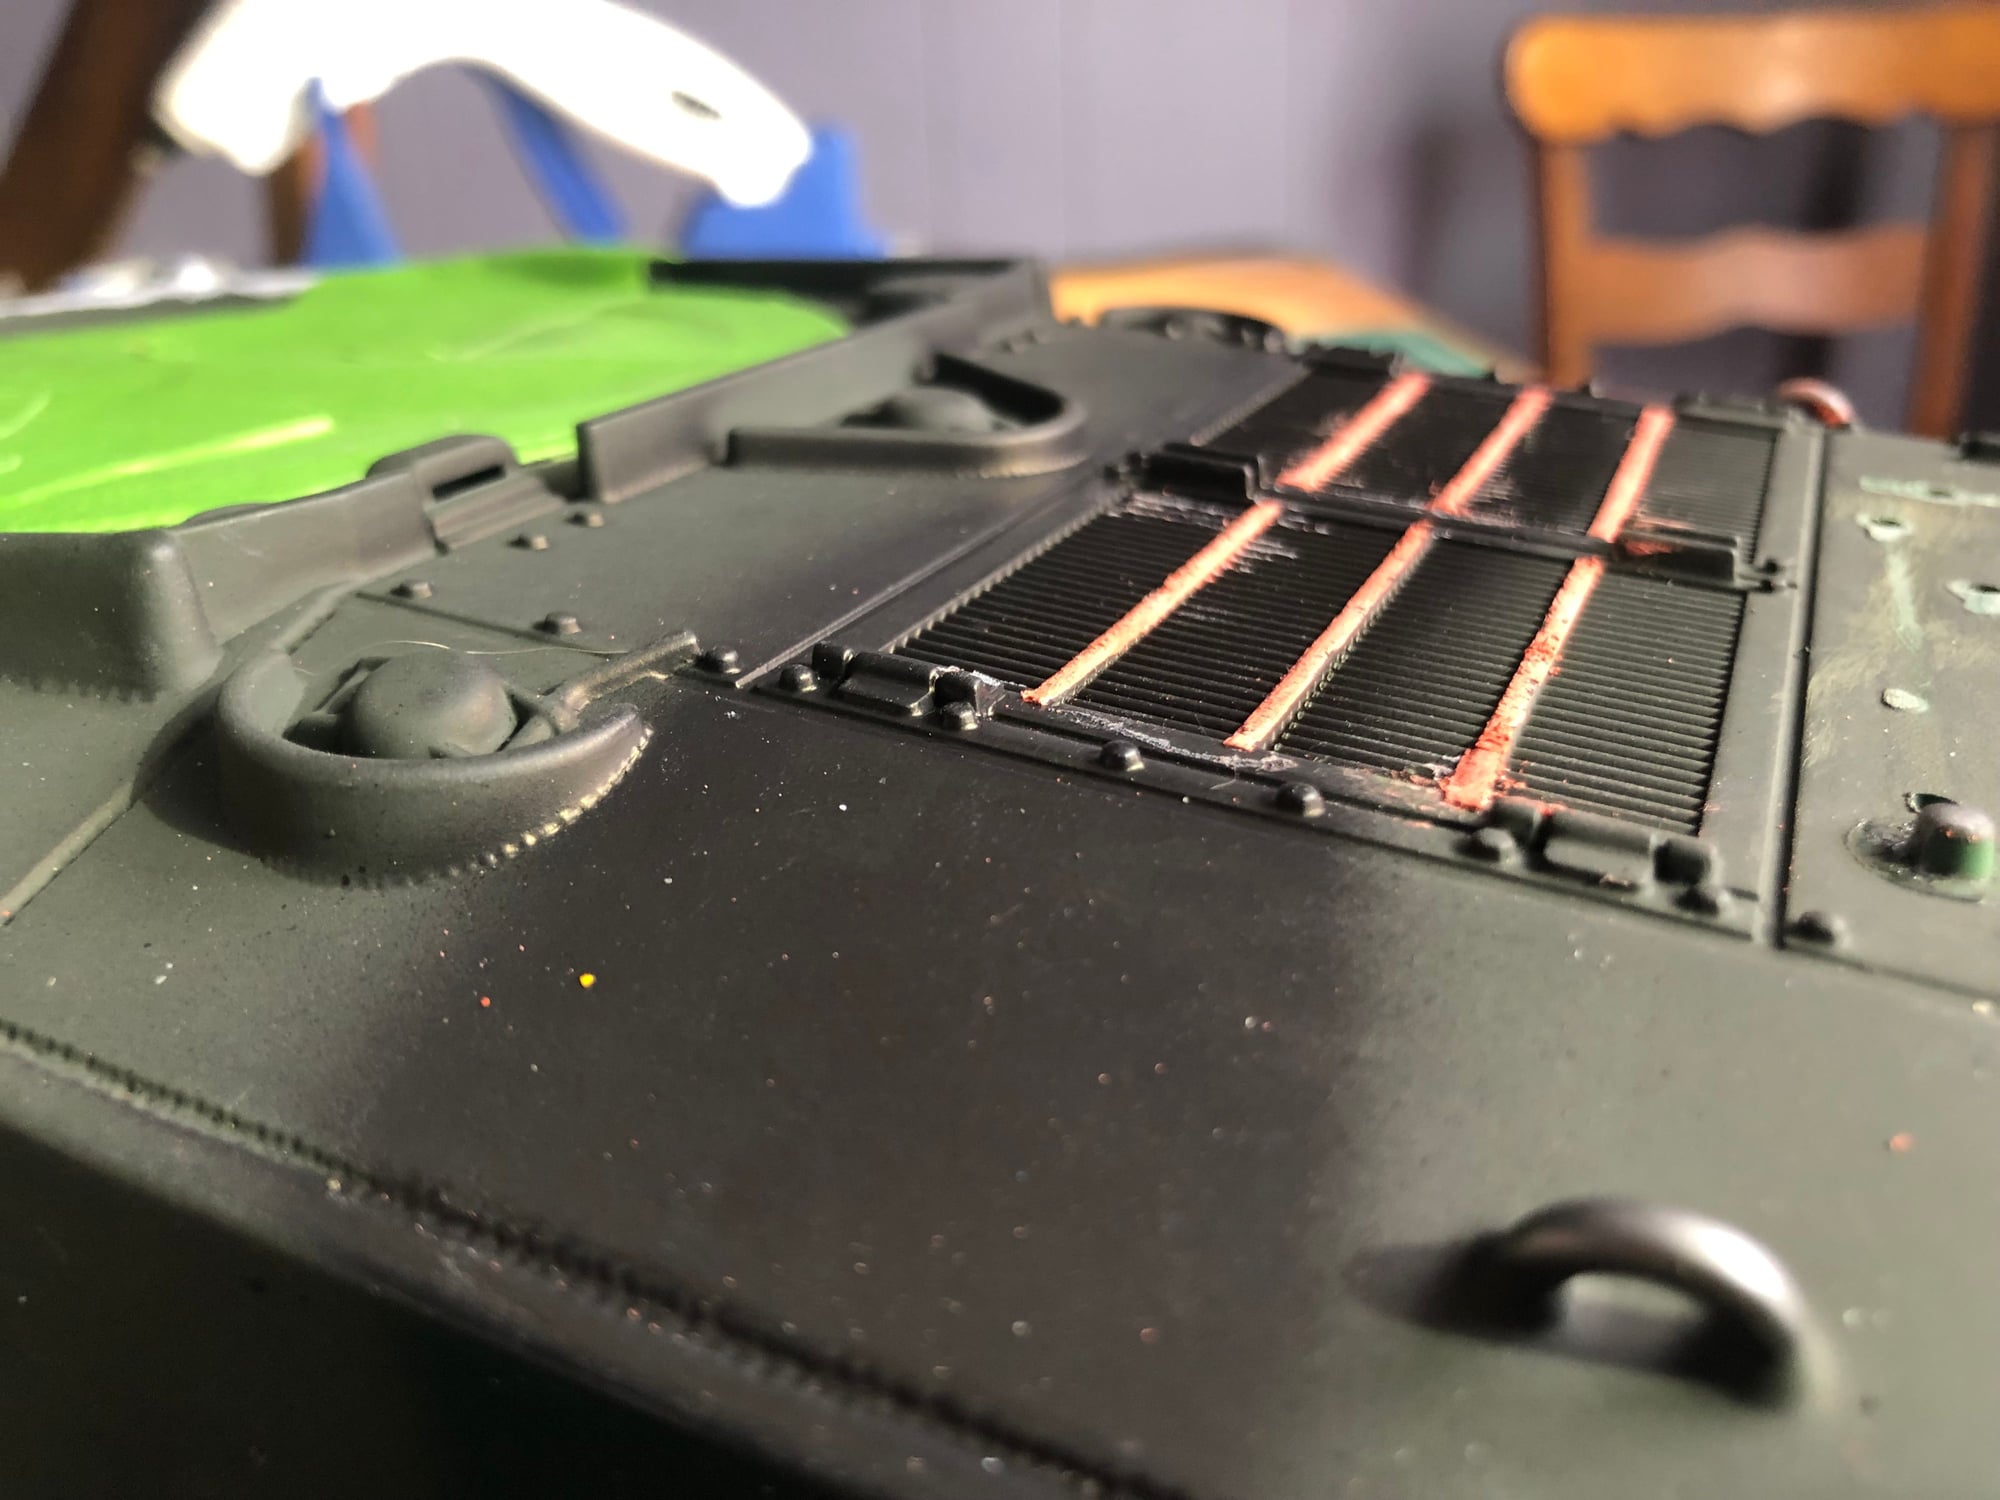
Bit of an update,
No explanation needed:
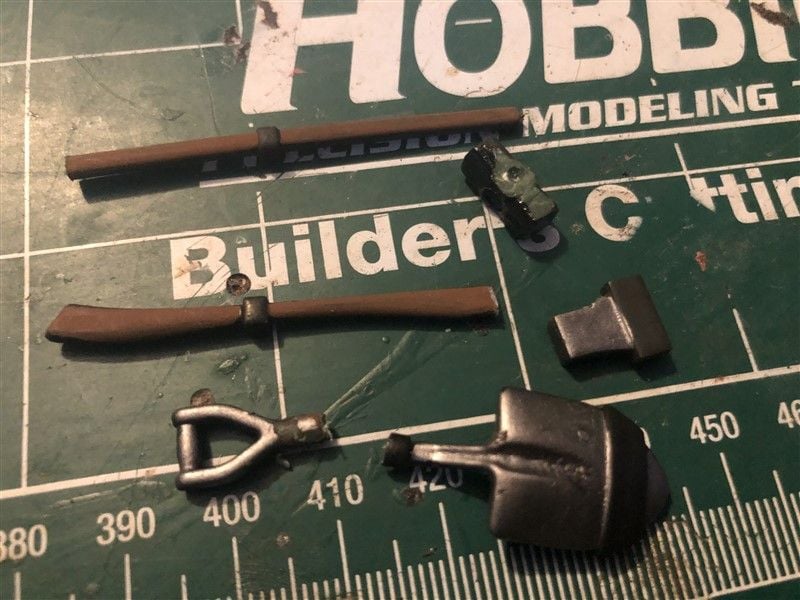
What better way to simulate wood then actual wood, I used a combination of Balsa, Bass wood, and wooden skewers.
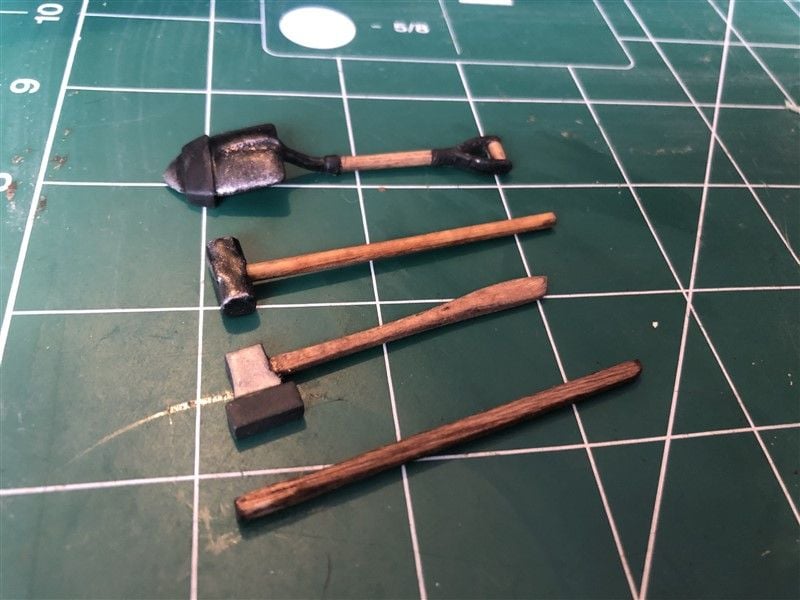
Cheers
Wade
No explanation needed:
What better way to simulate wood then actual wood, I used a combination of Balsa, Bass wood, and wooden skewers.
Cheers
Wade
04-16-2024, 02:27 PM
#47
Thread Starter
well it has been over a year and my tank still has not progressed. I relocated over the summer and there was just too much to get done. So this and basically any hobby took a backseat. My son and I are finally settled in ( because of divorce) But whatever lol. I had lost my job due to an illness and they would not hold my position (whole other story) After many many years in the health care field...I decided to take a different route and I can absolutely say it was the best decision I have made. I am now working for Mack trucks and I absolutely love it. Enough about me though. Hopefully I am back in the saddle with getting this finished.
Cheers,
Wade
Cheers,
Wade
The following 3 users liked this post by Rebellion13:
04-17-2024, 10:39 AM
#48
Life happens...
General Patton once said "Success, is how high you bounce, after you hit bottom".
General Patton once said "Success, is how high you bounce, after you hit bottom".
